Quick answer
The commonest reason a cake layer tears is an unlined pan base. Grease the pan, press in a precut parchment round or a cut sheet, then grease again over the paper. That second layer of grease is what lets the paper release cleanly instead of sticking to the crumb.

Katbite Unbleached Parchment Paper Rounds, 8 in, 200 Count
Precut 8 inch rounds, because the single most common reason a layer tears coming out of the pan is that nobody lined the base.
Best for: lining 8 inch pans without cutting circles
Check price on AmazonAsk anyone who decorates cakes for a living what causes the most torn layers and the answer is almost always the same: a base that was never lined. Greasing alone is not unreliable exactly, it simply is not enough on its own, because the flour and sugar in the batter caramelise slightly against the bare metal during baking and bond to it in a way that plain fat cannot fully release. A layer of parchment between the batter and the pan floor removes that risk entirely, and a lined base turns out clean almost every time.
The method that works is grease, then line, then grease again. The first layer of fat holds the paper in place against the pan floor so it does not shift while you pour the batter. The second layer, brushed or rubbed directly over the paper, is what actually lets the baked cake slide free once it is turned out. Skipping either step brings back some of the risk lining is meant to remove.
How do I line a round cake pan step by step?
This is the base method every other shape on this page builds from.
- Brush or rub a thin, even layer of solid fat, butter, shortening or a neutral cooking spray, over the entire floor of the pan.
- Cut a parchment round to match the pan, or use a precut round if you keep them on hand, which saves tracing and cutting a fresh one every time you bake.
- Press the round into the greased floor so it lies flat with no air bubbles trapped underneath, working from the centre outward.
- Grease the top of the parchment round with the same fat, covering it fully. This second layer is what actually releases the cake later.
- If the recipe calls for it, dust the greased sides of the pan with a light coating of flour or cocoa powder and tap out the excess, which helps release the sides as well as the base.
- Pour in the batter and bake as usual. Once cooled for about ten minutes in the pan, run a thin knife around the edge before turning out, and the parchment should lift away cleanly from the base.
How do I line a square, sheet or specialty pan?
The grease-line-grease method still applies, but a rectangular pan is easier lined with a sling than a single cut piece.
- Cut two strips of parchment, each a little longer than one dimension of the pan, wide enough to cover the floor and climb partway up two opposite sides.
- Grease the pan floor, then lay the first strip in running one direction, letting the excess hang over both ends as handles.
- Lay the second strip in the other direction, crossing the first, so the whole floor is covered and both sets of sides have an overhanging edge.
- Grease over the paper as with a round pan, then pour in the batter and bake.
- Once cooled, lift the whole cake straight out using the paper overhangs as handles, rather than trying to invert a large sheet cake, which risks it breaking.
A springform pan still benefits from a parchment round on the floor even though the latch releases the side wall on its own, and a bundt or tube pan is greased and floured rather than lined, since paper cannot follow a fluted interior.
Parchment, a silicone mat, or grease alone: what actually works?
Grease alone is the weakest option for a cake pan floor, even a good nonstick one, because it is the base of the pan, not the sides, that carries almost all of the risk of a torn layer. A silicone mat cut to fit the pan floor works on the same principle as parchment, giving batter a non-stick surface to sit against, but it is reusable rather than disposable, which suits a baker who lines pans often enough to make the upfront cost worth it.
| Option | How it works | Best for |
|---|---|---|
| Grease only, no liner | Relies entirely on fat to release the base | Only a shallow, dense batter in a very reliable nonstick pan; the least reliable option here |
| Precut parchment round | A disposable paper barrier between batter and metal | Everyday round layer baking; fastest to use once you keep a stack on hand |
| Parchment cut to fit | Same barrier, traced and cut from a sheet as needed | Any pan size or shape without a matching precut round |
| Reusable silicone mat | A washable, oven-safe non-stick surface cut to the pan floor | Bakers lining pans often enough to offset the higher upfront cost |
What goes wrong even when the pan is lined?
| What happened | Likely cause | What to check next time |
|---|---|---|
| Batter leaked under the parchment round | The paper was not pressed flat, or grease under it was too thick and let it float | Press the round down firmly from the centre out and use a thin, even coat of grease underneath |
| Paper stuck to the cake instead of the pan | The second layer of grease, over the paper, was skipped or too thin | Grease the top of the paper as thoroughly as the pan floor underneath it |
| Base still tore on turning out | Cake was turned out too soon, before it had firmed up during cooling | Cool in the pan about ten minutes before turning out, then peel the paper away slowly |
| Sides stuck even though the base released cleanly | Only the floor was lined; the sides were greased but not floured or dusted | Flour or dust the greased sides in addition to lining the base |
| Sheet cake cracked when lifted out | Tried to invert or slide a large sheet cake instead of using paper handles | Use the two-strip sling method and lift straight up by the overhanging paper |
What this job actually needs
Katbite Unbleached Parchment Paper Rounds, 8 in, 200 Count
$8.99Precut 8 inch rounds, because the single most common reason a layer tears coming out of the pan is that nobody lined the base.
Best for: lining 8 inch pans without cutting circles
Check price on AmazonAmazon prices move often, so check before you buy.

Fat Daddio's Anodized Aluminum Round Cake Pans, 8 x 2 in, 2 Piece Set
$24.69Two matched 8 by 2 inch pans, which is exactly one two layer cake, in the anodized aluminum that bakes flatter than a dark nonstick pan because it reflects rather than absorbs.
Best for: the standard two layer 8 inch cake
Check price on AmazonAmazon prices move often, so check before you buy.
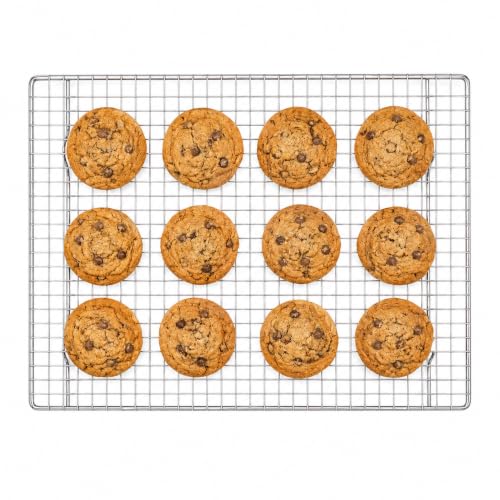
Mrs. Anderson's Baking Professional Cooling Rack, Heavy Duty Steel
$10.99Sized to sit inside a half sheet pan, so it doubles as a drip rack for glazing and ganache instead of being a single purpose item.
Best for: cooling layers and catching glaze
Check price on AmazonAmazon prices move often, so check before you buy.
Questions people ask
- Do I need to line a cake pan if it is nonstick?
- Lining is still worth doing even on a nonstick pan, especially on the base. Nonstick coatings reduce sticking but do not eliminate the caramelised bond that forms between batter and hot metal, and a nonstick surface also wears down over repeated uses. A parchment round on the floor costs a few seconds and removes the risk entirely.
- What is the best way to line a round cake pan?
- Grease the pan floor, press in a parchment round cut or bought to match the pan size, then grease the top of that paper as well. The second layer of grease over the paper is the step people skip most often, and it is what actually lets the baked layer release cleanly instead of sticking to the parchment.
- Should I line the sides of a cake pan too?
- Usually just greasing the sides, with a light dusting of flour or cocoa powder, is enough, since the sides do not carry the same weight or contact pressure as the floor once the cake is turned out. The base is where a full parchment lining matters most, because that is where nearly all torn layers actually happen.
- Can I use wax paper instead of parchment to line a cake pan?
- No, not for baking. Wax paper is coated in a thin layer of wax that can melt and smoke at oven temperatures, transferring flavor onto the cake. Parchment paper is coated to withstand oven heat safely and is the correct choice for lining a pan that is going into the oven.
- Why did my cake still stick even though I lined the pan?
- The most common reason is skipping the second grease step, the one applied over the top of the parchment rather than just under it. Without that layer, the paper itself can bond to the baked crumb. Turning the cake out too soon, before it has cooled enough to firm up, is the other common cause.
Related pages
How this page was put together
Researched from pan geometry, published manufacturer capacities, published serving conventions and university extension guidance. Not hands-on testing, and not professional advice.
Figures are labelled as derived, published or trade convention. Where no honest figure exists, the page says so rather than filling the gap.